Creating New Workspaces
In this section, you will learn how to create a new workspaces in the platform.
The process of creating a workspace consists of the following:
- Setting Up Workspace Info
- Configuring Category & Code
- Setting Up Dynamic Files Filters
- Adding Static Files to the Workspace
- Configuring Auto-Run Models
Setting Up Workspace Info
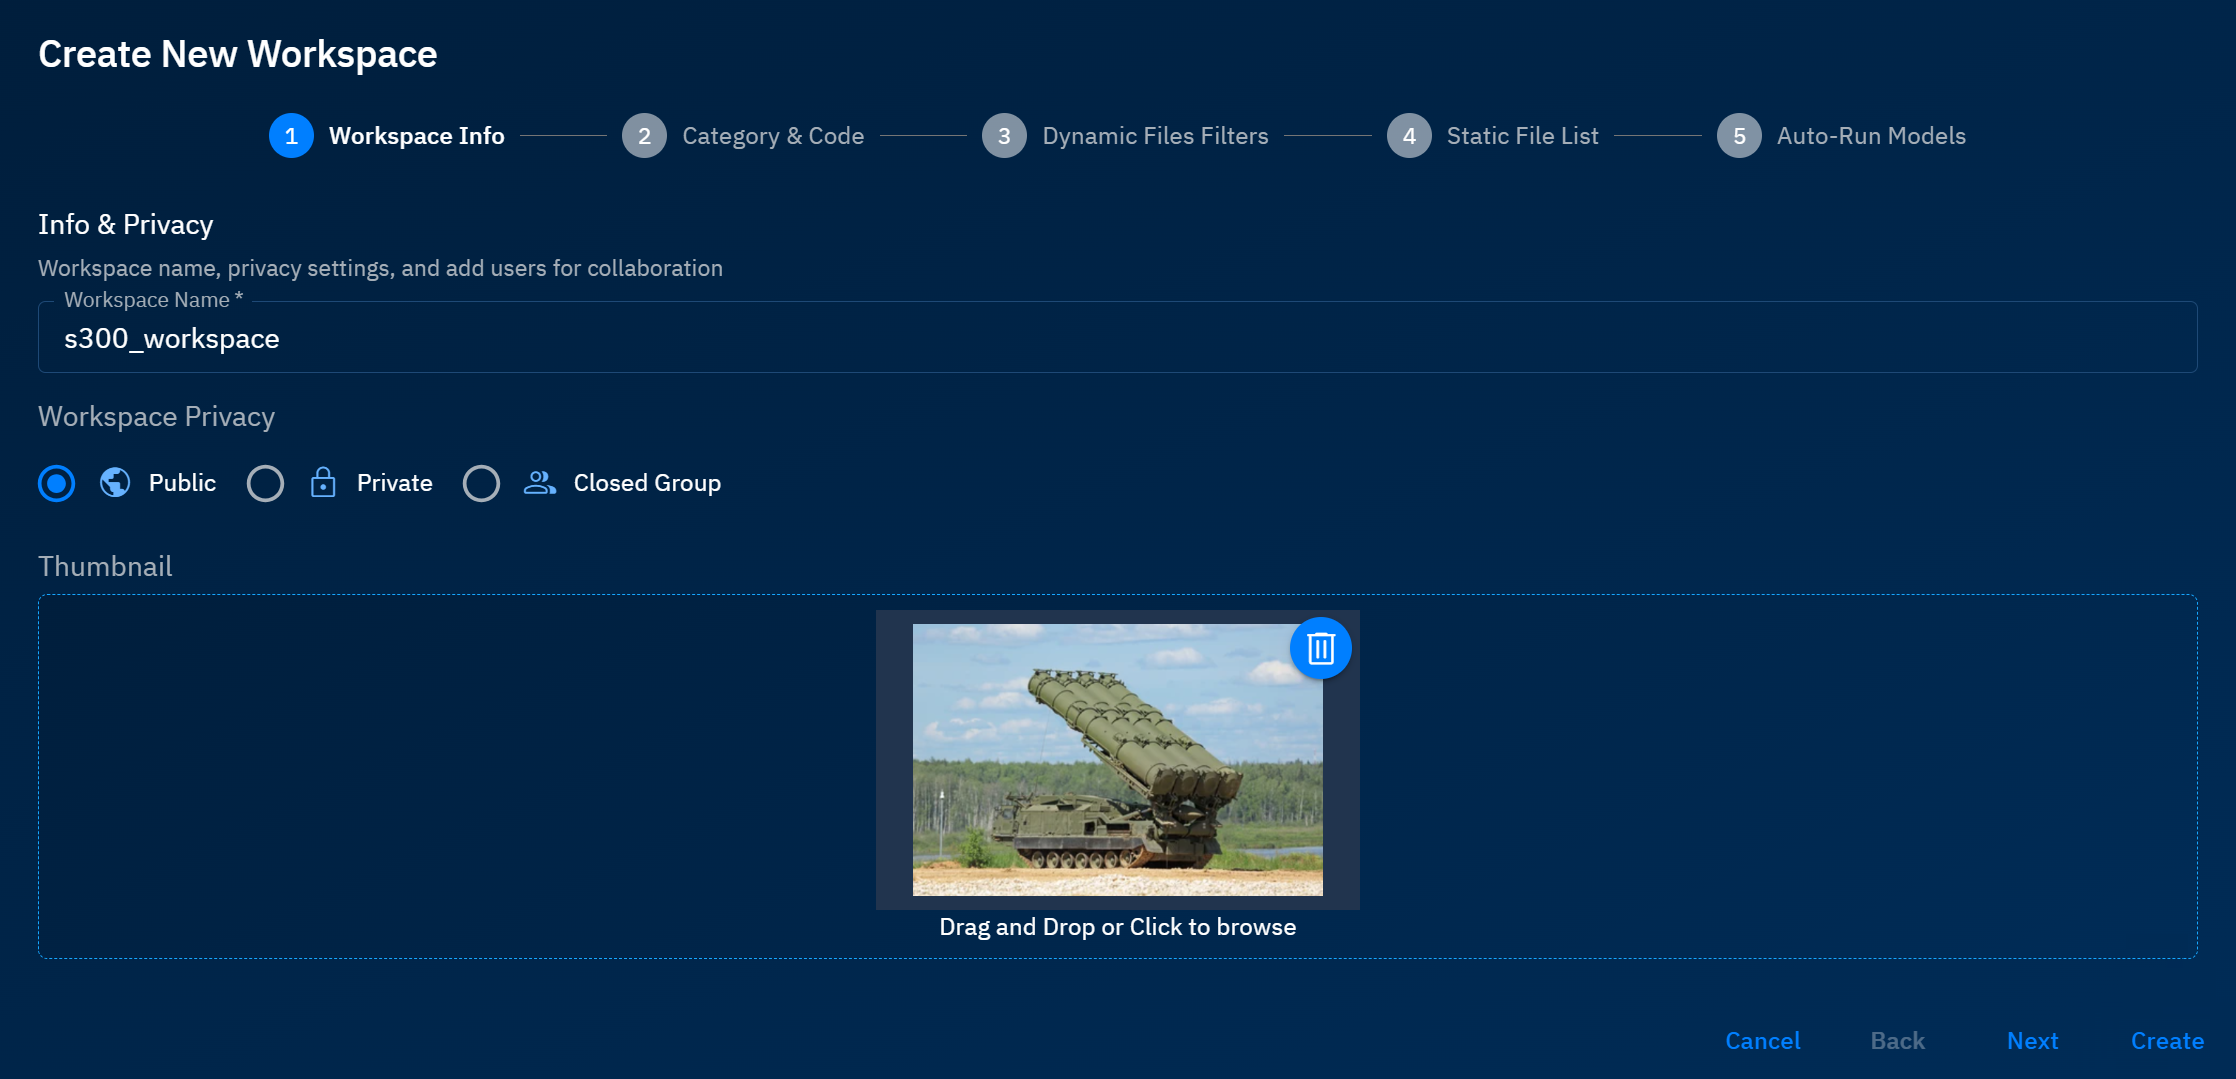
First, let's set up a workspace information: workspace name, privacy thumbnail enabling you and other users in the organization to visually identify a workspace.
To set up workspace info, do the following:
-
Login to the platform.
-
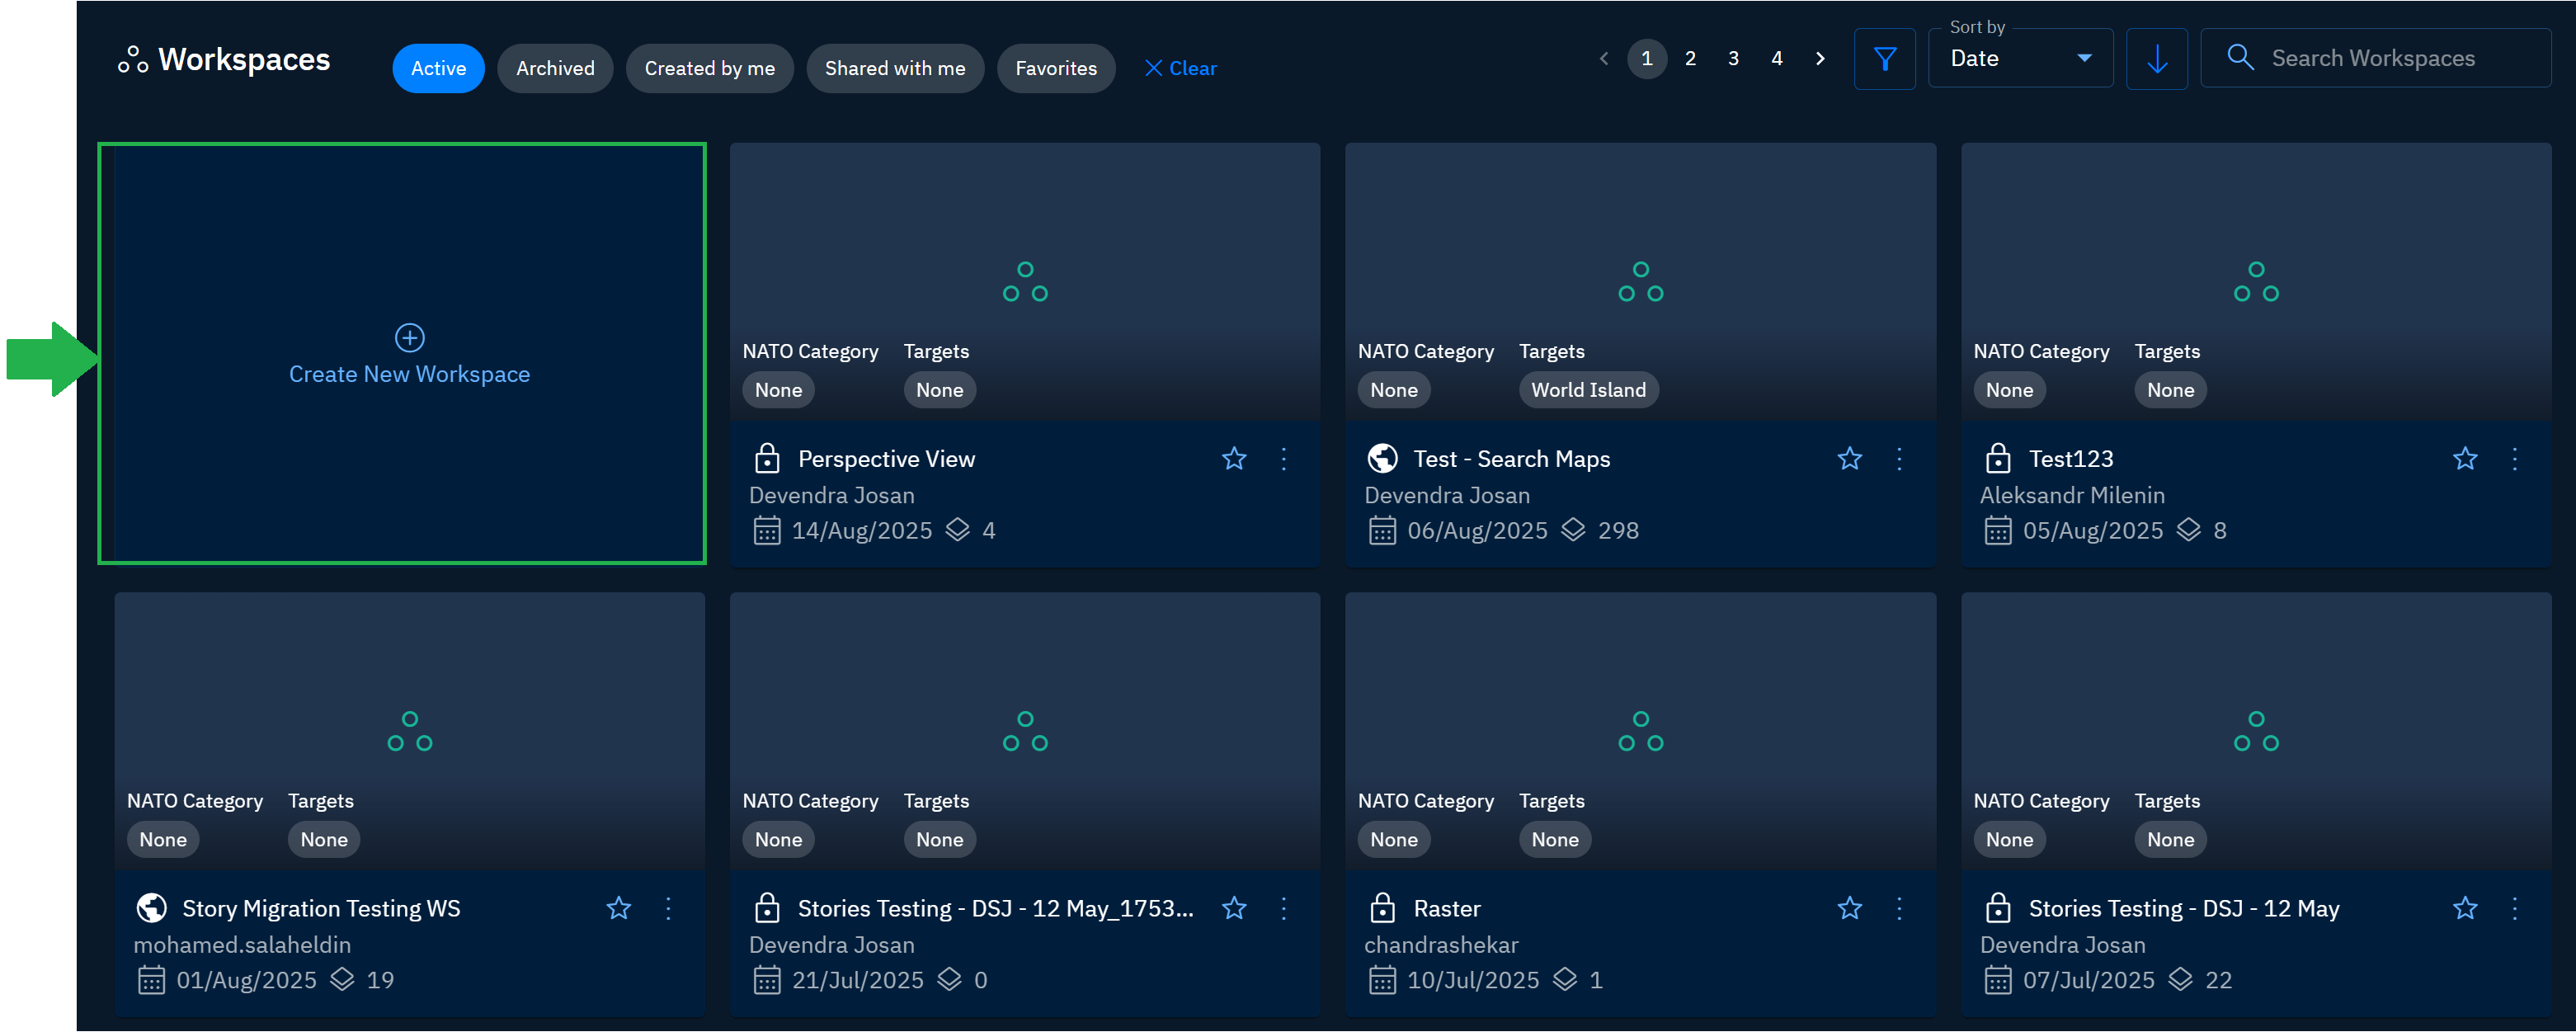
In the right-hand panel, click the Collaborate module, and then click the Workspaces tile.
The Workspaces Dashboard page is displayed.
-
In the Workspaces Dashboard page, click the Create New Workspace tile.
The Create New Workspace dialog box is displayed.
-
In the Create New Workspace dialog box, do the following:
-
Type the workspace name in the Workspace Name field.
-
Select one of the following workspace privacy options in the Workspace Privacy section:
Workspace Privacy Description Workspace Visibility Public A workspace that is open to all the users in the organization All users can view and edit this workspace Private A workspace that is open for only you. Only you can view and edit this workspace Close Group A workspace that is open to only team members selected in the group All users in the group can view and edit this workspace -
Upload an image or simply drag-n-drop an image that you want to display as the workspace thumbnail in the Thumbnail section.
-
-
Do one of the following:
- Click the Save button to save and exit.
- Click the Next button to go to the next screen.
Configuring Category & Code
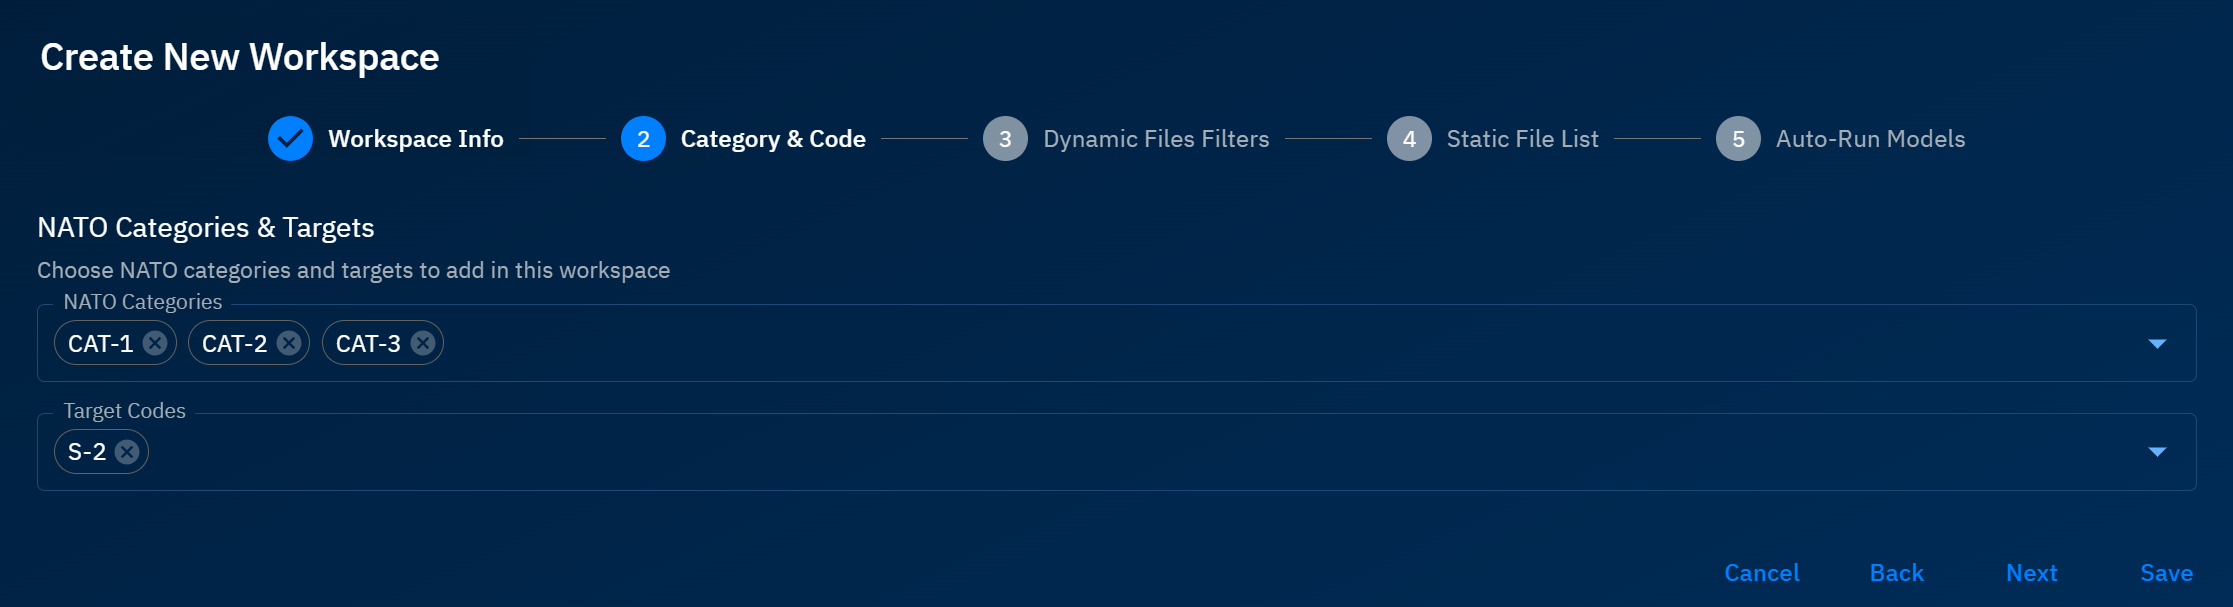
Configure filters based on NATO standards to determine what kind of targets or data the workspace will focus on.
In NATO military operations and intelligence, Categories and Target Codes are part of a structured targeting and reporting system used to identify, classify, and prioritize potential or active targets.
To configure NATO categories and target codes, do the following:
-
Select the appropriate categories from the NATO Categories drop-down list.
-
Select the appropriate code from the Target Codes drop-down list.
-
Do one of the following:
-
Click the Save button to save and exit.
-
Click the Next button to go to the next screen.
-
Setting Up Dynamic Files Filters
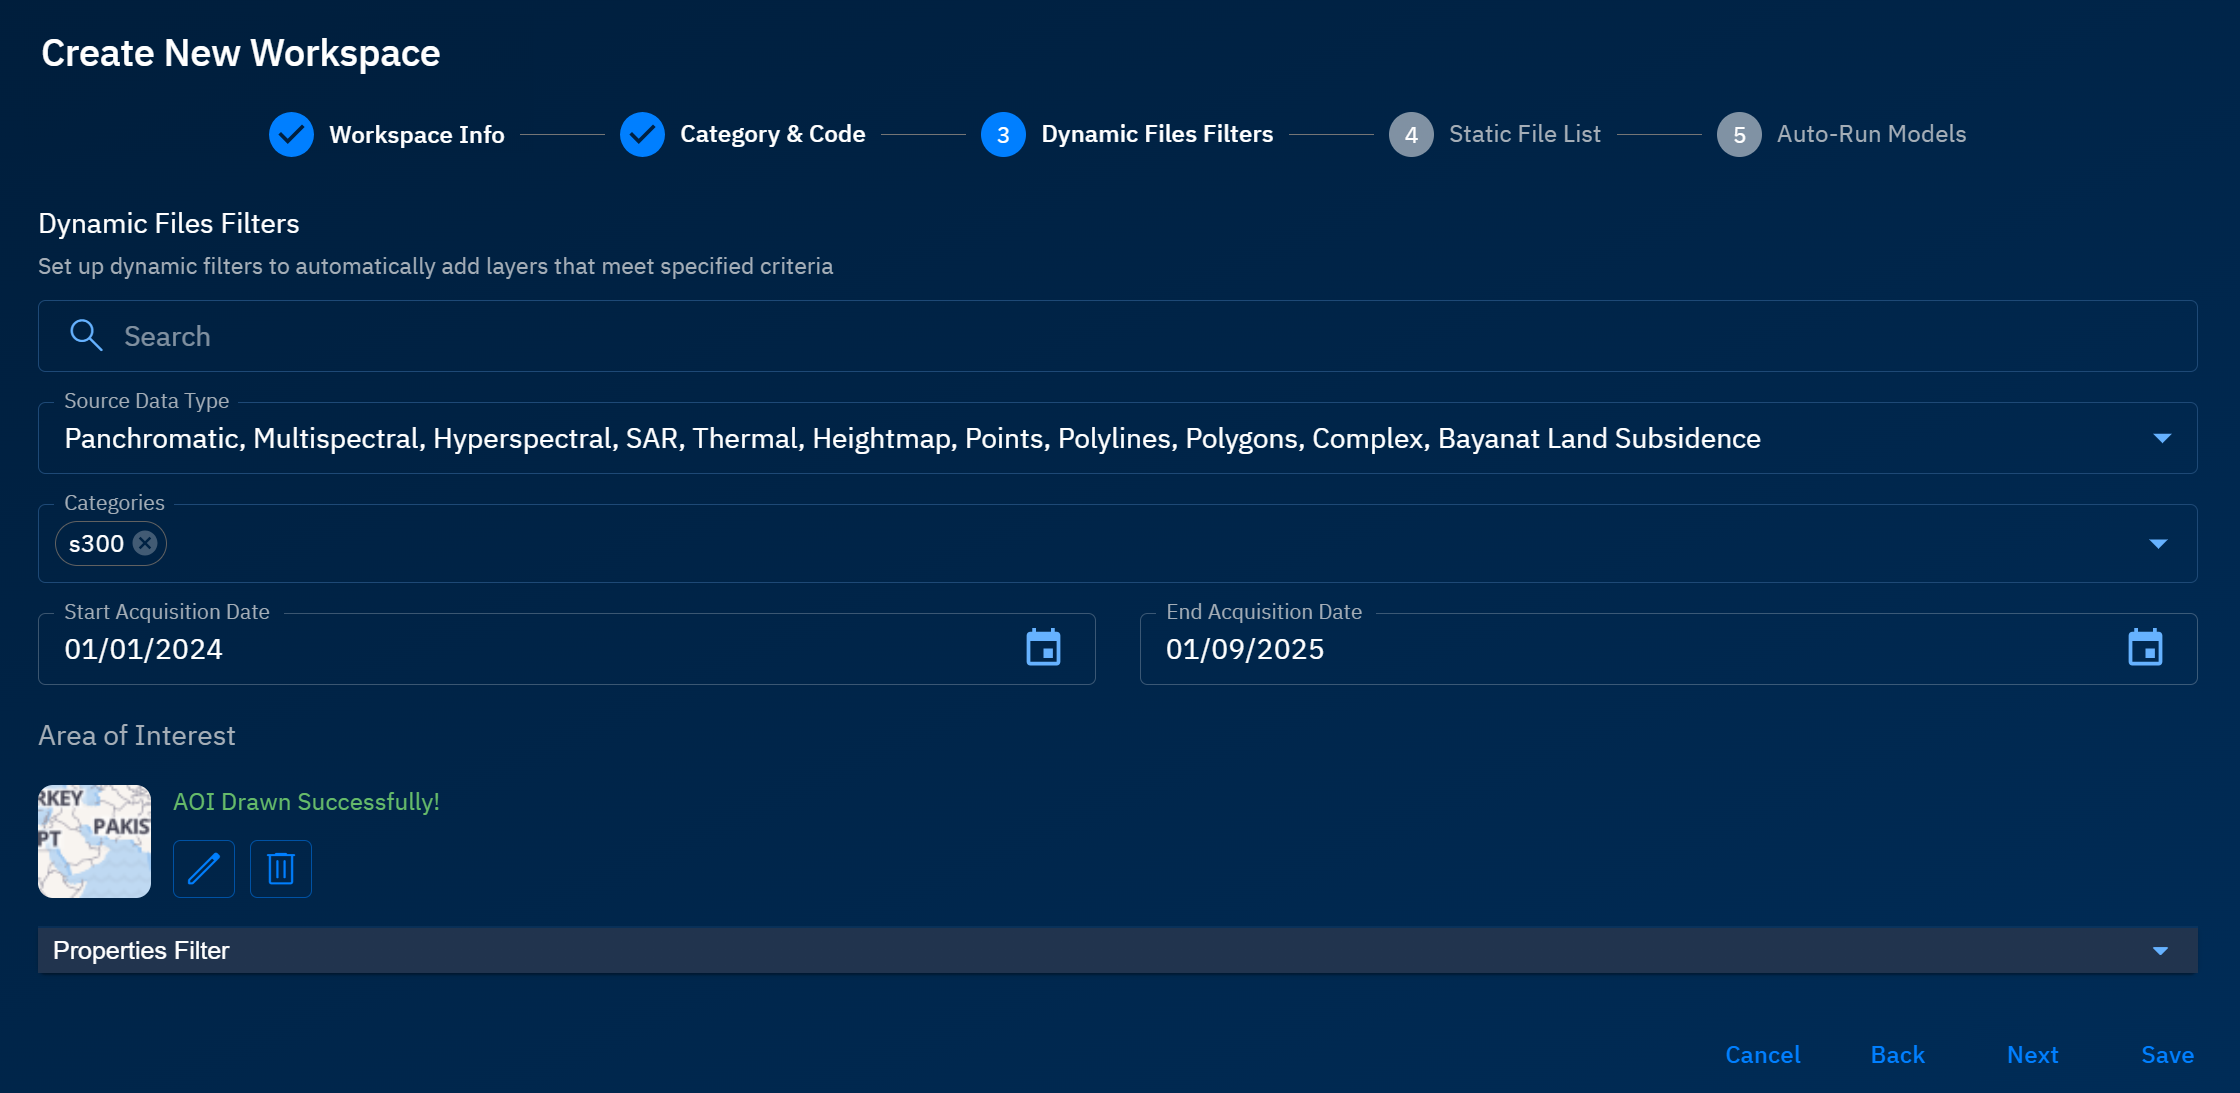
Search, select, and allow dynamic addition of layers and categories (that meet pre-defined criteria) in the workspace.
For example, suppose you create a new AOI on the map and populate it with SAR image layers. When you apply a dynamic files filter, the workspace automatically adds any new SAR images uploaded to the application that match the AOI. This way, your AOI always stays updated with the latest SAR images—without requiring you to add them manually.
To set up dynamic file filters, do the following:
-
Click the Create New Filter button and do the following:
-
Click the Source Data Type drop-down list and select the data type that you want to enable in the workspace.
-
Click the Categories drop-down list to select type of categories that can be enabled in the workspace. Furthermore, you can click the > icon to open a specific category to view and add a sub-category. For example, click the aircraft category to open, view, and add sub-categories namely B52, F16, F35, MIG 31, and so on…
-
Select the Start Acquisition Date and End Acquisition Date of the images that you want to dynamically filter onto the Area of Interest (AOI).
-
Click the Draw An Area of Interest (AOI) button to draw a specify a geographic extent on the map. Once an area of interest is specified, all the current and future images of this specified area will be automatically made available to you.
-
-
Do one of the following:
-
Click the Save button to save and exit.
-
Click the Next button to go to the next screen.
-
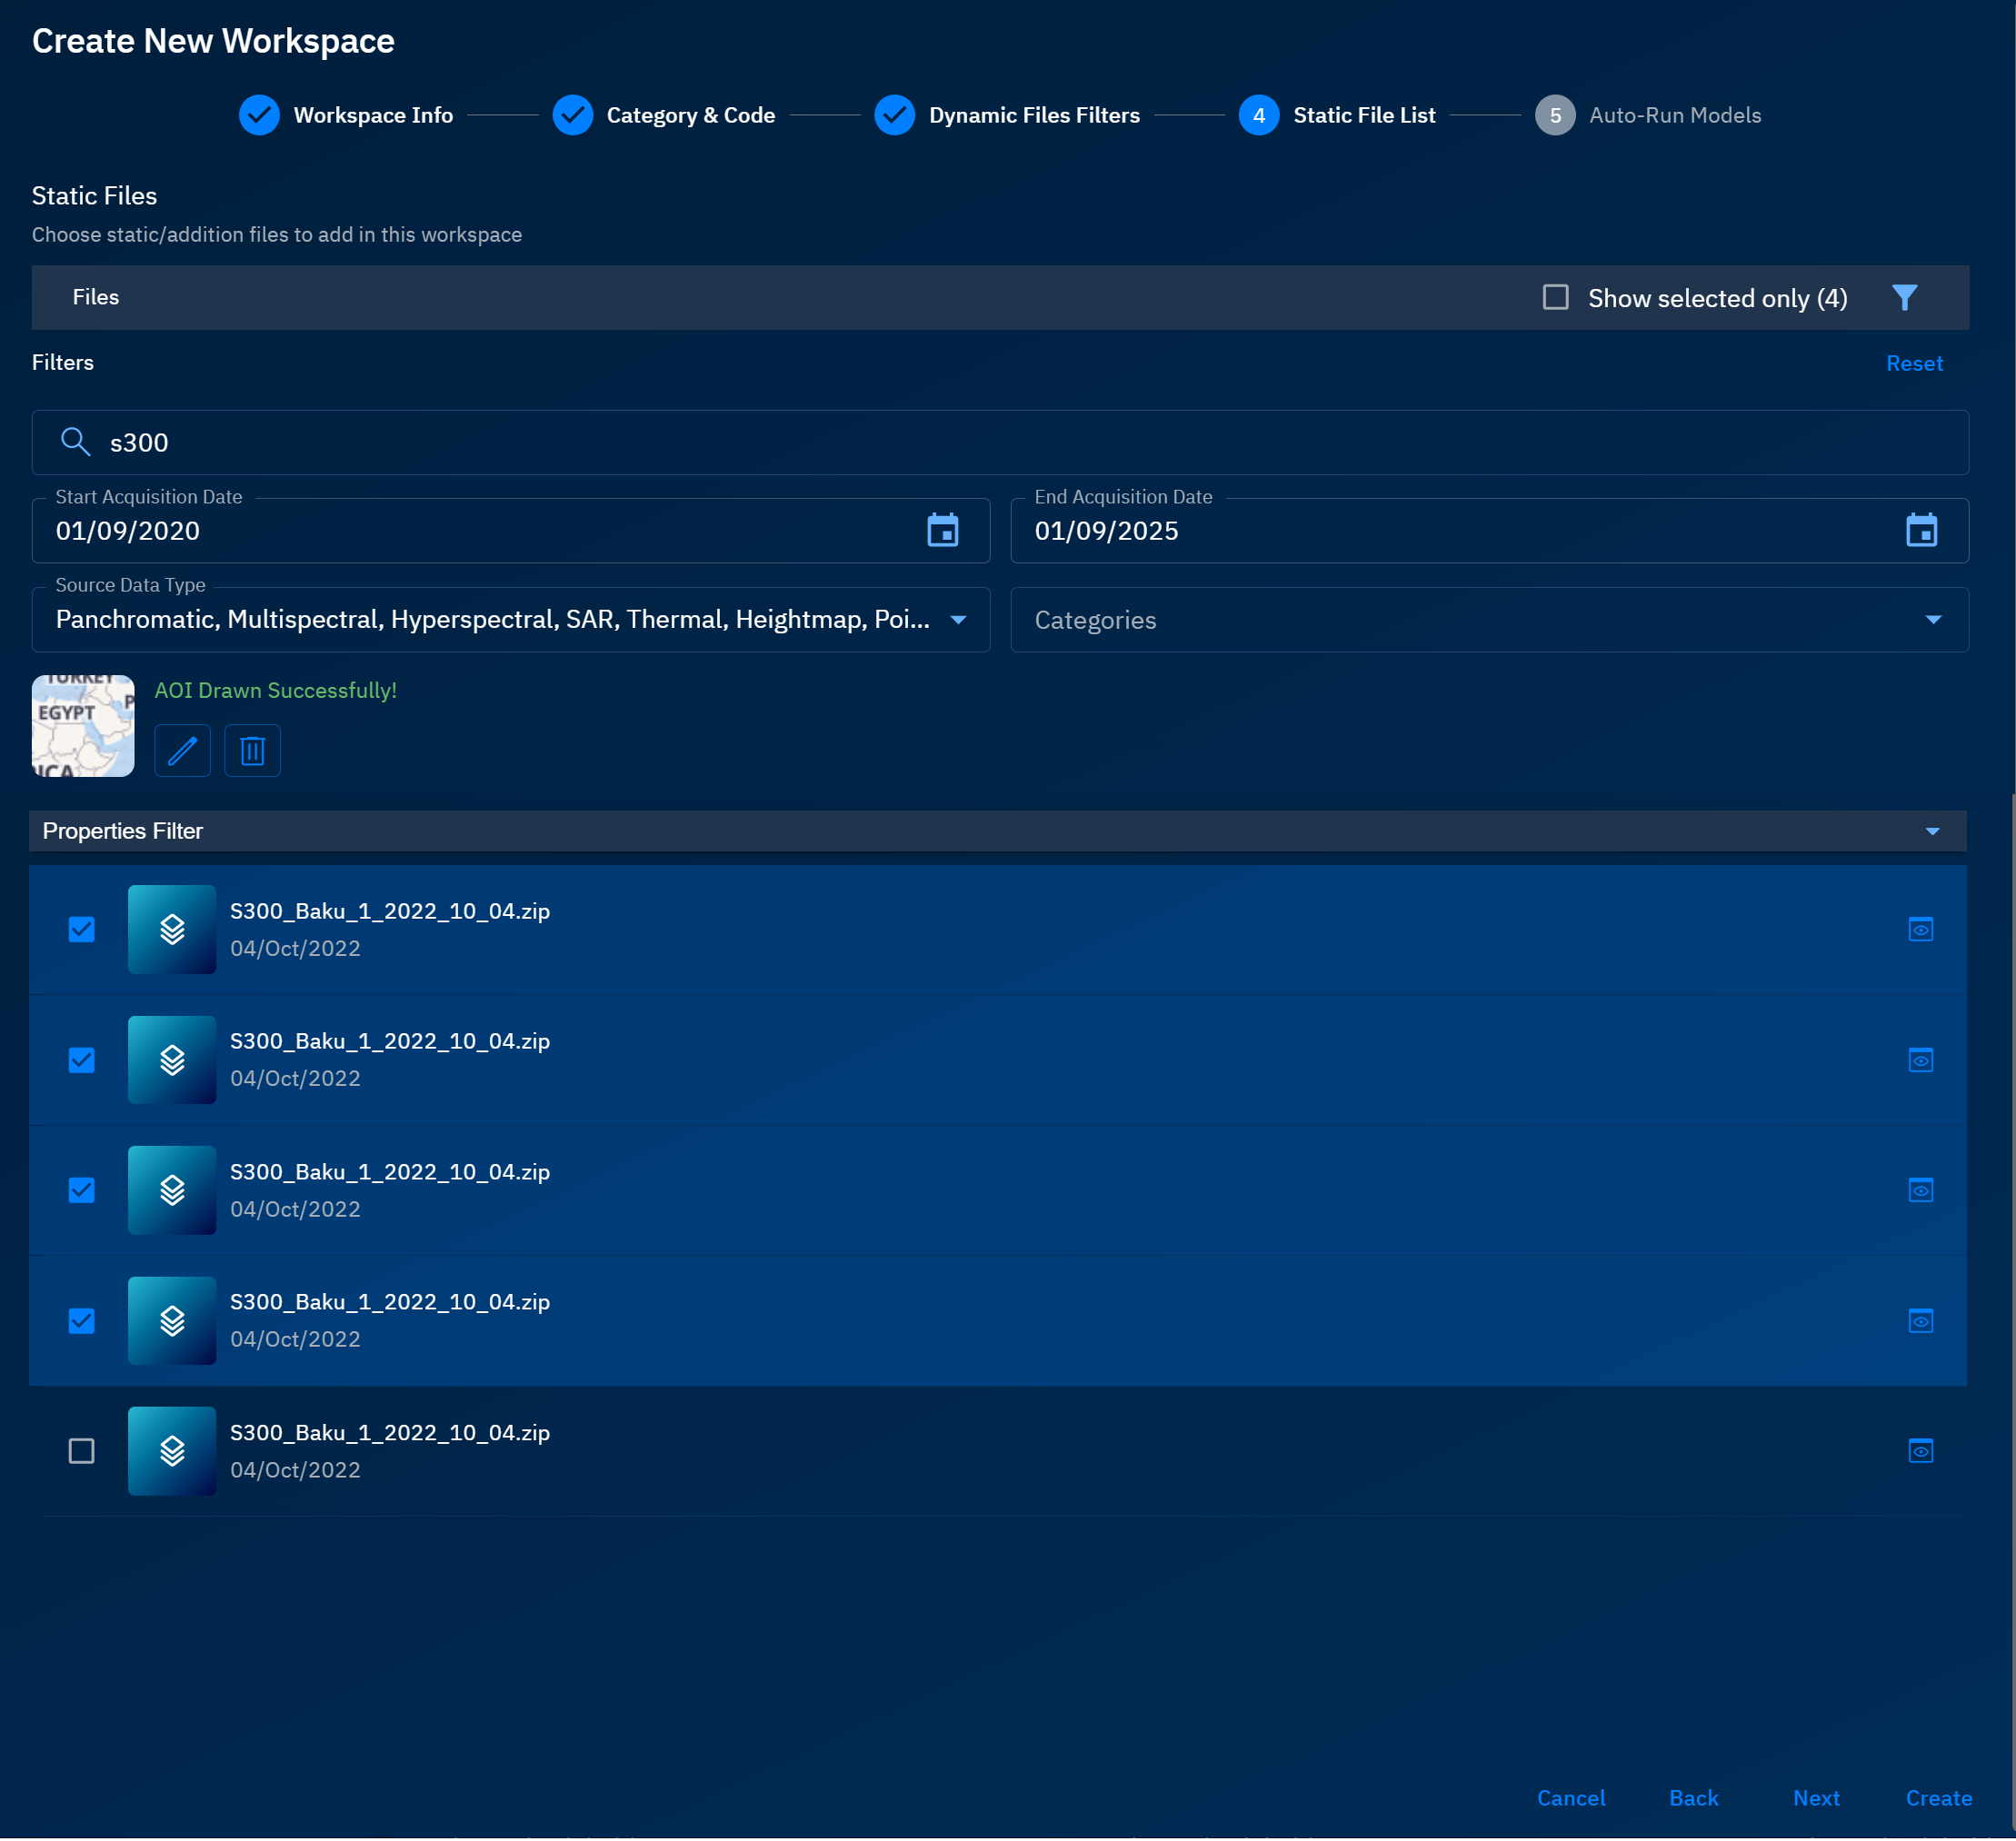
Adding Static Files to the Workspace
Add single or multiple files of the same or different formats from the images library to the workspace.
To add static files, do the following:
-
Click the Filter icon, and do the following:
-
Type the keyword in the Search field to find an appropriate static file. For example, S300
-
Select a Start Acquisition Date and End Acquisition Date of the static images.
-
Select the type of source file you want to add as static files in Source Data Type drop-down list.
-
Click the Draw an Area of Interest button to specify an area of the static files.
-
-
Do one of the following:
- Click the Save button to save and exit.
- Click the Next button to go to the next screen.
If you are new to using the platform, you might not see any images in the static file list tab because you may not not uploaded multiple images to the platform yet.
Dynamic files are like temporary files that can be added or removed as needed. You can draw an Area of Interest (AOI) and specify which types of files (formats, category, sub-category) should be included. If any user in your organization uploads matching files, they will be automatically added to the AOI.
Static files, on the other hand, are permanent files. Once uploaded to the library, these files can be searched and reused across any workspace you choose.
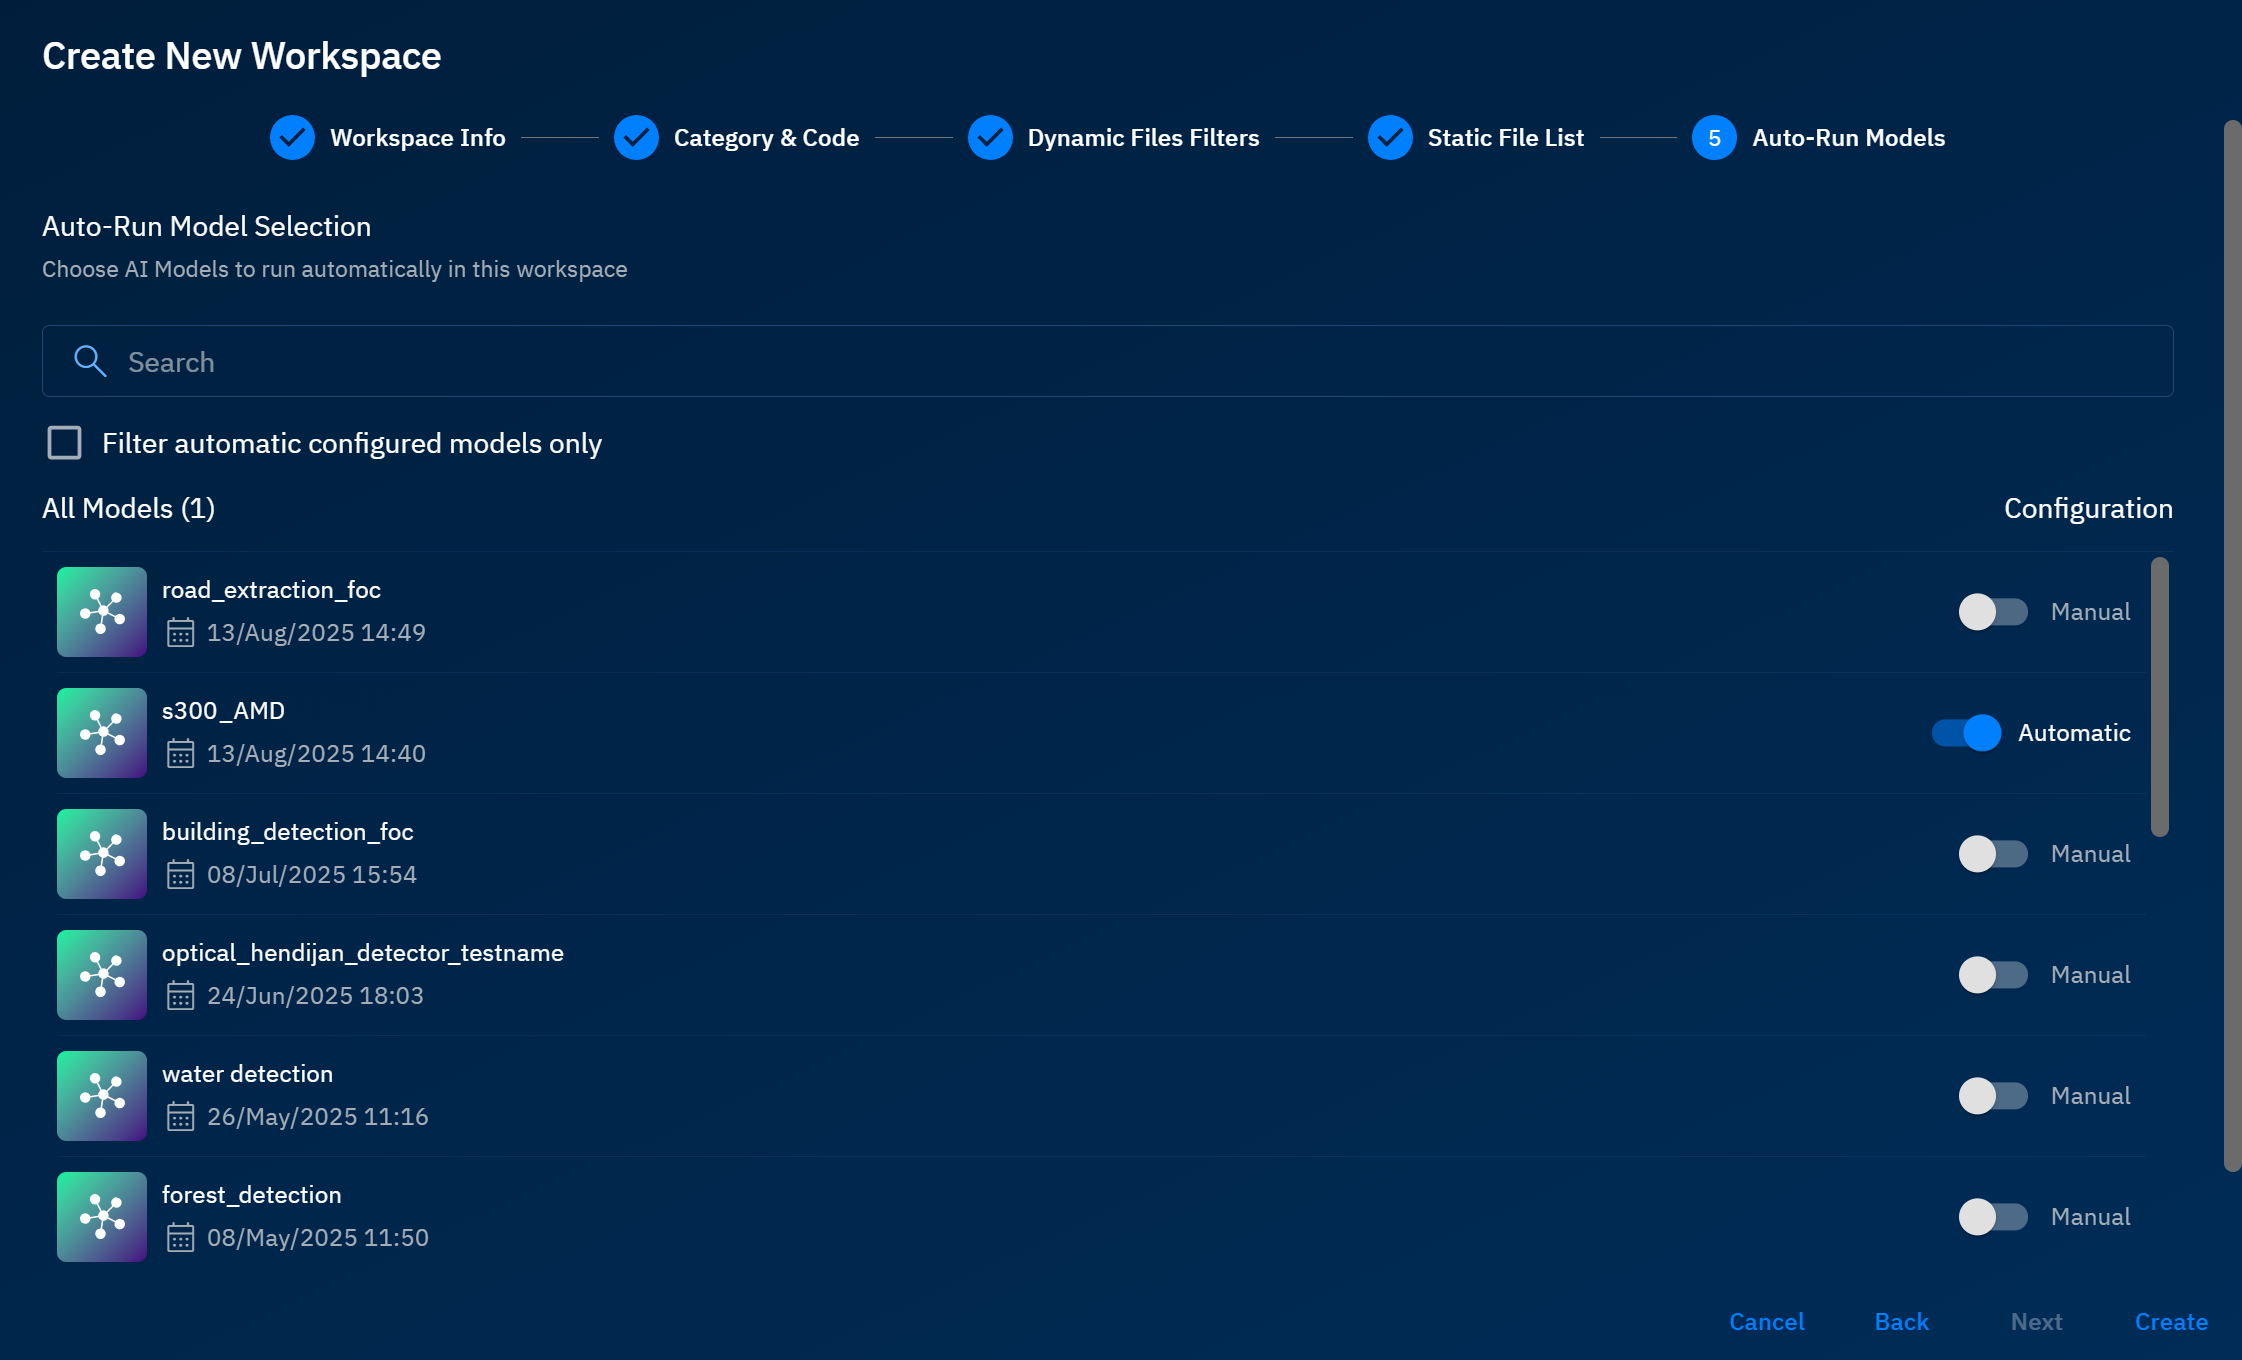
Configuring Auto-Run Models
Select AI Models that you want to automatically run in this workspace.
To configure auto-run models, do the following:
-
Type a keyword in the Search field to find an AI model. For example, S300 or Palm Tree.
-
Select the AI model and turn on the toggle button to run it automatically. This enables the platform to automatically run the selected AI model on any of the files or layers added dynamically or manually to the workspace, thereby detecting the objects that the AI model is designed to detect.
-
Click the Create button to create a new workspace.
A new workspace is created in the platform.